Upcycled Burlap Ottoman

Instructions
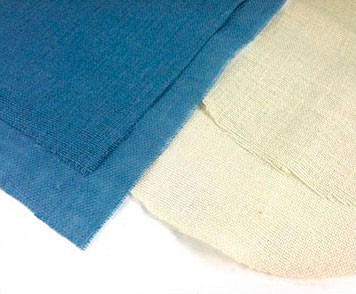
1. Cut four 22" circles of white burlap and two 72" x 16" strips of blue burlap. The double thickness of burlap will increase the durability of the ottoman.
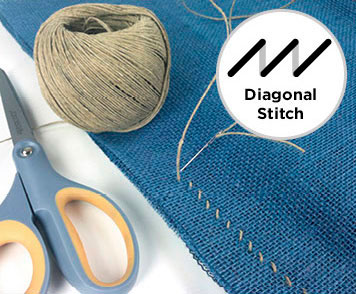
2. Lay the two strips of blue burlap on top of each other. Use hemp and a blunt tapestry needle to sew the ends together using a diagonal stitch.
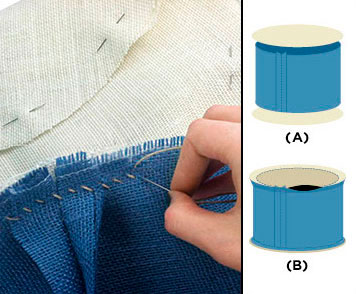
3. Lay the two sets of white burlap circles on top of each other. Use the extra needles to pin the circles to the top and bottom edges of the blue burlap cylinder. Sew them onto the edges of the cylinder (Image A). Before completing the last circle, leave a 9" long gap (Image B).
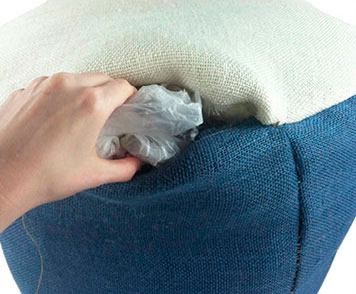
4. Turn the cylinder inside out. Stuff the inside of the structure and the top and bottom areas with three bags of Polyester Flufferfill. The Flufferfill will give shape to the ottoman and ensure that the top and bottom are soft to the touch. Stuff the remaining space with plastic bags until packed to desired firmness.
5. When the ottoman is sufficiently firm and has the desired shape, hold the seam together and use a whip stitch (an exposed diagonal stitch) to finish the seam.

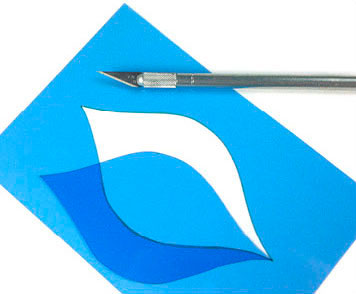
6. Use a premade stencil or use an X-Acto knife to cut a petal shape into a piece of Grafix Stencil Film. You can also freehand a design if you prefer.
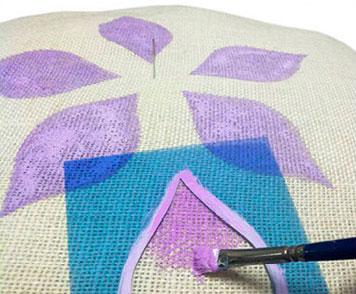
7. Place a needle directly in the center of the ottoman to serve as a guide. Stencil on petals using Jacquard Textile Colors. NOTE: Burlap shifts when sewing. We recommend painting after all pieces are sewn in place, otherwise the design may be warped or off-center.
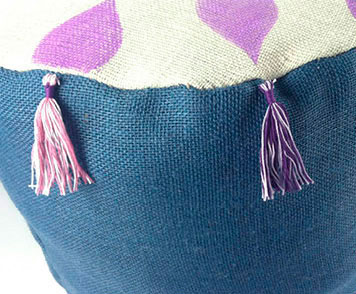
8. Add a touch of whimsy with tassels made from bundles of embroidery floss.