Mardi Gras Masks with Flair

Instructions
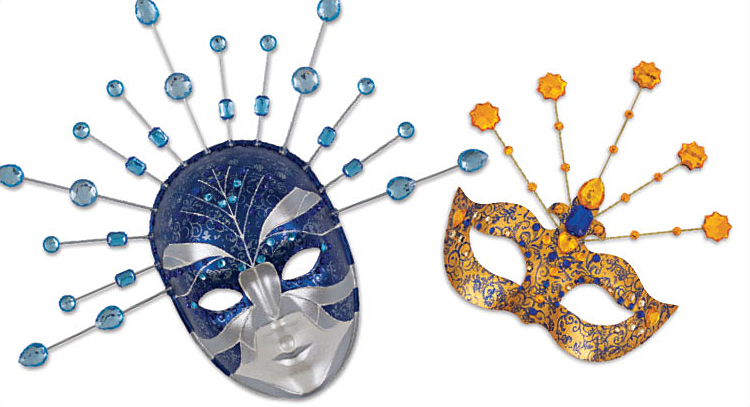
1. Select a Creativity Street Pulp Mask as your base and choose a palette of Jacquard Lumiere Acrylics. For this project, we used the Venice mask, which has raised guidelines on its surface, and the colors Indigo, Metallic Silver, and Super Sparkle.
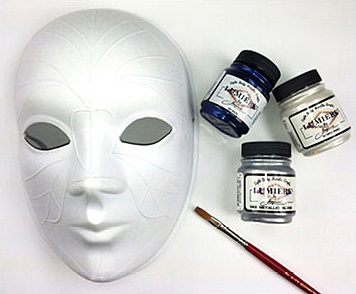
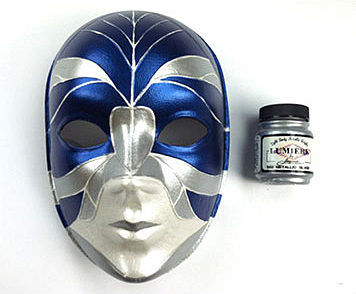
2. Paint the entire mask with 2–3 coats of Super Sparkle and let dry. Fill in the shapes between the raised lines of the mask with 2–3 coats of the Indigo and Metallic Silver colors to create a unique design.
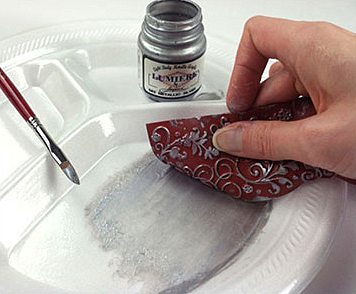
3. Add detail and texture to the darker areas of the mask by coating the Floral Flourish Mayco Designer Clay Stamp with Metallic Silver paint.
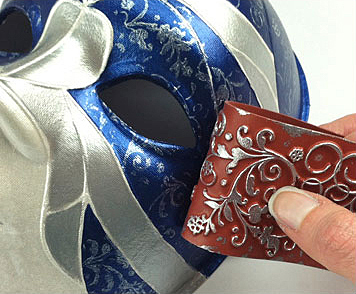
4. Press the wet stamp onto the Indigo areas. The flexibility of the clay stamp allows for texture to wrap around the curves and get into the crevices of the mask. Work quickly — the paint dries fast.
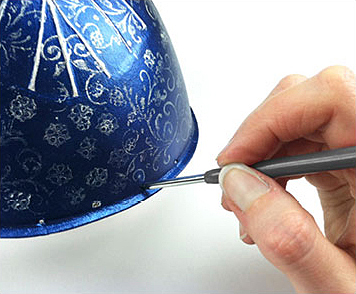
5. Use a thick sewing needle or a clay needle tool to punch small holes along the forehead of the mask, just above the lip. Start at the center of the top of the mask and punch holes approximately one inch apart. There should be 13 holes when finished.
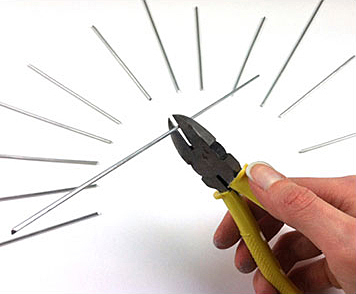
6. Cut three of the 12" silver Amaco WireForm Soft Metal Rods in half so there are six, 6" sections. Then cut the remaining three rods into thirds so there are nine, 4" sections.
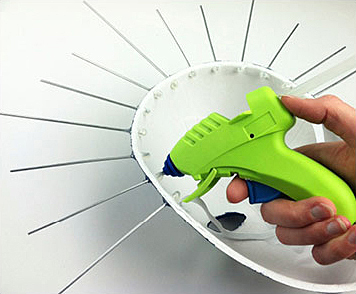
7. Poke the wire sections through the needle holes and secure with hot glue. Create an alternating pattern using five of the 6" sections and eight of the 4" sections. The pattern should go large-small-small and repeat, ending on large. Thoroughly coat the ends of the wire with glue to protect your face from the sharp ends of the wire.
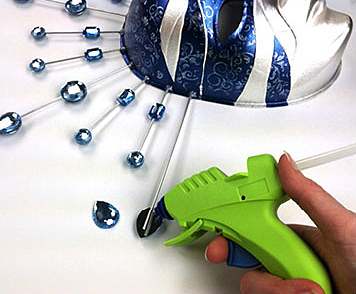
8. When the glue is cool and dry, sort out some of the acrylic gems to affix to the rods. Feel free to mix and match colors. Squeeze a large glob of hot glue onto the back of one gem and press it to the wire. Promptly press a matching gem atop the bottom gem with the wire sandwiched in between. Repeat this step for all of the rods, alternating large and small gems.
9. Embellish the mask further with rhinestones, feathers, glitter, or sequins. These methods can also be applied to half masks (the Crown mask is featured at right). Masks can be worn or hung as wall decorations.
NOTE: If you plan on wearing the Venice style mask for any duration, it's recommended that nose or mouth slits be cut into the mask to allow for easier breathing.