Hand Lettered Cards

Instructions
1. Sketch out the phrase that will be used for the greeting card. This will work as a guide and allow you to plan letter placement and overall design.

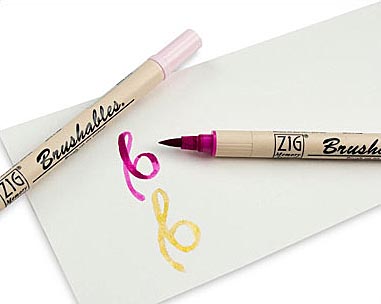
2. The downstroke of each letter will be thicker than the upstroke. Practice the placement of your downstrokes using the Zig Brushables Dual Tip Markers, or combine the Pentel Aquash Water Brush with the watercolor pigments.
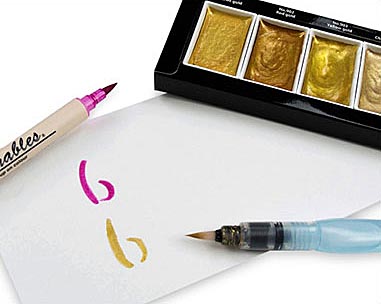
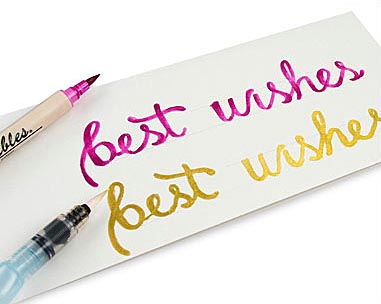
3. Add the thinner upstroke marks to complete the letter. To add dimension to your letter, use the darker end of the marker at the top and bottom of the strokes or where desired. Use a lighter marker to blend the darker color into the original color. If you're working with the watercolor pigments, use the Pentel brush to add the upstrokes as instructed above. This method may require multiple layers depending on the desired look. Allow the watercolor pigment to dry between each application.
4. Complete the phrase, using the same technique for each letter. Add pencil lines, if needed, to help with letter height and placement. Once it's completed and the ink has dried, erase the pencil markings. Reference Creative Lettering: Techniques & Tips From Top Artists for more hand lettering instruction, techniques, and styles.
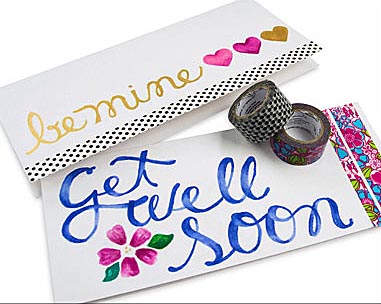
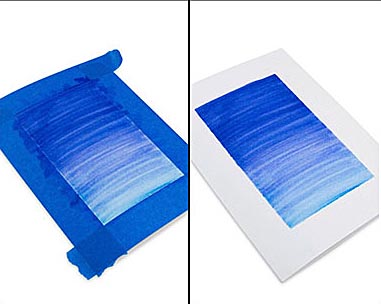
5. The Zig Brushables can also be used to create a gradient background for cards. Simply tape off the edges of the cards and work quickly to blend the darker color down into the lighter color. Let dry and carefully remove the tape.
6. Add your own original designs or drawings to the cards. Easily add color and pattern with Washi tape. Hand lettering takes continued practice but provides original heartfelt card designs for those you love.