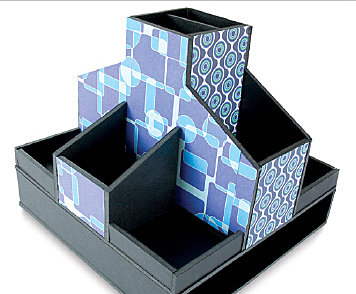
DIY Foam Board Desk Organizer

Instructions
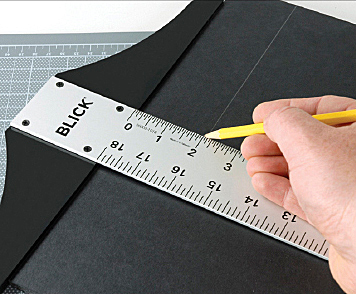
1. Download and open the PDF where you will find a list of all the pieces needed for the project with measurements. One 32" x 40" sheet of foam board should suffice, but you may want more on hand in case of mistakes. Use the t-square to make exact measurements and mark your cut lines with a pencil. Make heavier marks if you are using black foam board, so you can see them easier.
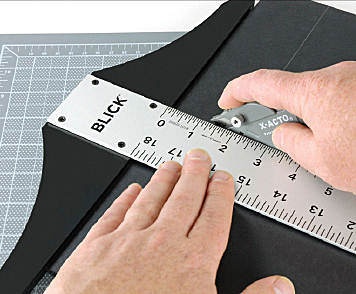
2. When you are ready to cut, place the foam board on the cutting mat to prevent damaging your work surface. Adjust the blade depth of the X-Acto cutter for .25" board. Place and hold the t-square or metal ruler along the pencil lines and slowly pull the cutter toward you, keeping the blade against your ruler. The MightyCore is rigid, so it may take more than one pass to cut through the board. It is best to make multiple cuts rather than pressing too hard, as your cuts may become ragged.
3. When all of the necessary pieces have been cut, decorate some of the larger pieces with decorative paper or paint markers. Measure and trim the paper to match the board size, or just trim the paper after gluing so there are no edges hanging over. Spray the foam board pieces with a light coat of adhesive and attach the decorative paper to the foam board.

4. On page two of the PDF, you will find the Base Guides. Following the guides, use the t-square and a pencil to mark one of your 12" x 12" base pieces as shown. These lines will be a guide for where to glue the various pieces to the base.
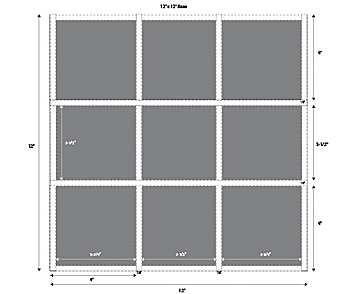
5. On page three of the PDF, there is a step-by-step visual guide for where and how to glue the pieces to the marked 12" x 12" base. All of the pieces in this guide are marked with a letter that corresponds to the list of pieces on page one of the document.
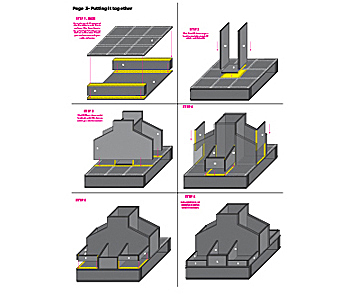
6. Before gluing any pieces, place them on your marked base and make sure they are level and the correct size. Trim pieces down or re-cut to fit some spaces snugly. Note: When the pieces have been glued down, they can be removed but damage may occur.
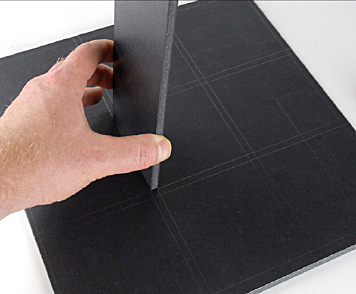
7. Warm up the glue gun for approximately five minutes. Insert a glue stick and hold the trigger to spread the glue along the edge of the board to be glued down. Don't use too much or it will ooze over the side. The glue dries fast and strong, so try to position the pieces where you want them as quickly as possible.

8. When you are done gluing, check that all your pieces are securely attached. For additional convenience, glue the active sculpting wheel in the center of the bottom piece of the organizer for 360° rotating action!