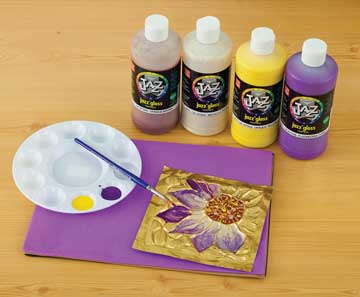
Tempera Enameling

Instructions
Preparation
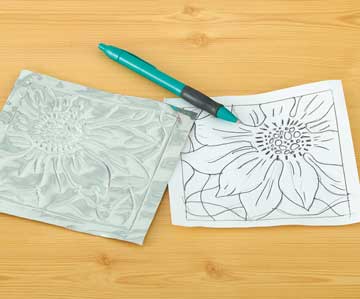
1. Cut foil to the desired size. Cut chipboard into pieces 1" smaller than the foil for each dimension. Example: if the foil is 6" x 8", the chipboard pieces should be 5" x 7". Using a pencil, trace around the chipboard onto a sheet of paper and create a line drawing within the outline. Keep in mind that these will be embossed lines, so it is important that they not be too small, too close together, or too complicated for tooling. Lines should create mostly closed shapes that will hold color, much like a stained glass window. Note: the designs will be reversed, affecting lettering and words.
2. Place foil on a sheet of craft foam or thick felt with the back side facing up. Place the drawing over the foil and secure it temporarily with masking tape. Use a pencil to trace the sketch, pressing down so that it transfers onto the foil below. Remove the sketch and retrace the lines using a wooden tool, pressing deeply into the foil.
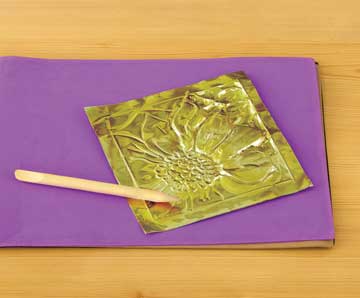
3. Turn the sheet over. The lines on the front side are now raised. The next step is to press back down from the front side, creating areas of depth and stretching the metal even further. This is known as “chasing.” As it is worked, the foil is stretching and becoming thinner. It's common for small tears to form. These can be repaired by placing a small piece of masking tape on the back side. These tears will likely be hidden when the paint is applied.
4. Once embossed, apply tempera on the front side, making sure the recessed areas are filled. Tempera will naturally flow into the lower areas of the design and away from the raised areas. Allow to dry for several hours. Use a damp paper towel to gently remove any excess from the raised areas of the metal.