Architectural Letters

Instructions
1. Use a pencil to design a letter shape (or another shape) on drawing paper. The letter should be a minimum of 2-1/2” thick in all areas, but may be up to 14” x 22” overall. Cut out the shape and use it as a pattern to trace onto both chipboard pieces. Cut out the chipboard shapes.

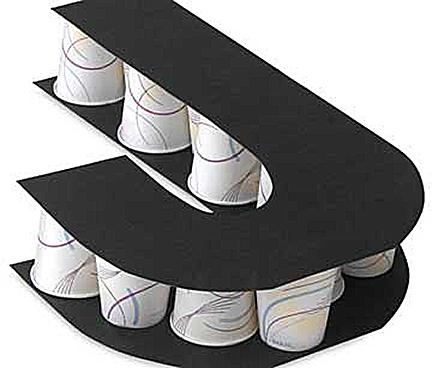
2. Take one chipboard letter, right-side-up, and glue paper cups onto it, alternating them up and down so the cups fit together snugly. The more cups that are used, the stronger the letter will be. Allow the glue to dry until tacky, then glue the top letter in place, being careful to align it with the bottom letter. Allow it to dry completely.
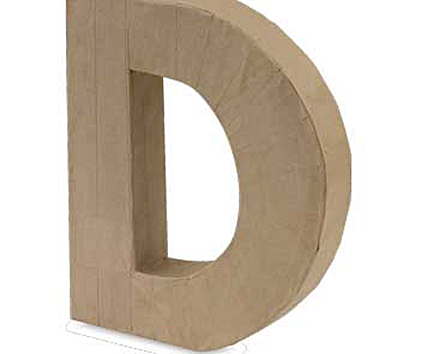
3. Cut paper tape into a variety of lengths. Dampen the adhesive on the tape with a sponge, and wrap the tape around the letter. Continue until all surfaces are completely covered with at least two layers of paper tape. Apply the tape as smoothly as possible, avoiding excessive overlapping.
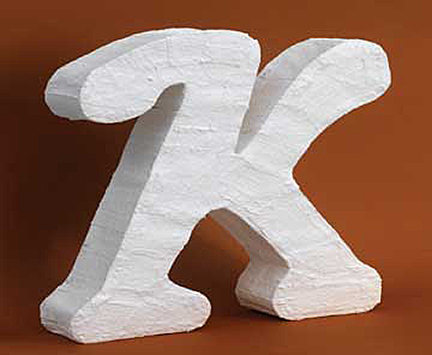
4. Apply two coats of acrylic gesso to prepare the surface for decorating, and to help seal any edges. Texture can also be created by applying Gel Medium after the gesso has dried. To finish, embellish the surface of the letter with descriptive words, images, and symbols that are meaningful. Some options for surface decoration include drawing, collage, and painting.